Frank-ly Speaking...
Published on Mar 1, 2015
This video is Frank Hardison talking about the beginnings of golf with the original balls used and the clubs as well. He donated to Sunrise Country Club a wonderful collection of original old balls and clubs. He is a very young 97 year old gentleman (in the true sense of the word...), immeasurably generous, and a wonderful story-teller. Here is the link to the YouTube video:
https://youtu.be/zgb_opL4djI
Perhaps you could pass the above little tidbit onto your spouses too...

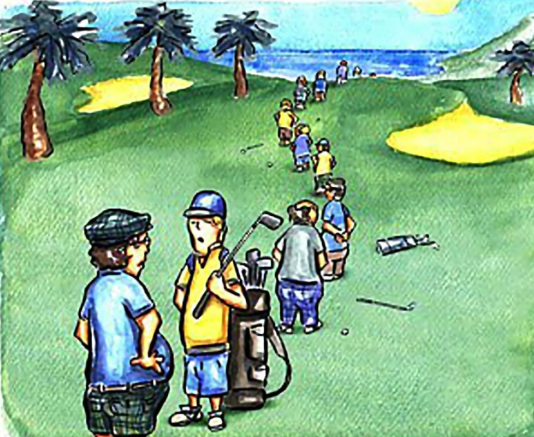
Various Speed of Play Issues
Picking Up and Posting
When we play team events we always talk about picking up your ball when you can't help your partner or partners. Many golfers believe that if they pick up before finishing the hole they cannot post their score. Not true. If, say, your partner putts in for a 5 and gets one stroke or pop and you are lying 5 and have one pop, you should pick up your ball. If you think you could reasonably get in the cup with one more stroke, put a 6 on your scorecard. If you would usually take two putts to hole out, score a 7. These imputed scores may be posted for handicap purposes. For the competition that day, however, the person whose score you are counting must put the ball in the cup.
If players are picking up in some groups but not others, the pace of play is going to be disrupted. So, it is important that everyone follow the same procedure when our pro announces that we should pick up if we cannot help.
You may also post a score even if you do not finish all 18 holes. If you play at least 13 holes, you may either post a score for the completed front or back 9 or you may take "net pars" on the remaining 5 holes and post a score for 18. A "net par" is par plus the number of strokes or pops you are entitled to on the holes you did not play. For example, par on #16 is 4. If you get two pops on #16, your "net par" is 6.
Before you hit:
Use the time you spend getting to your ball to think about the next shot - the yardage, the club selection.
When you reach your ball you'll need less time to figure out the shot.
Work on building a concise pre-shot routine.
If your pre-shot routine is a lengthy one, it's probably in your best interests to shorten it anyway.
Limit practice strokes to one or two at the most.
After Putting Out:
After putting out, don't stand around the green chatting or take any practice putting strokes. Leave the green quickly so the group behind can play. If there is no group behind, then a few practice putts are fine.
Other tips on speeding up play:
If you are unsure whether your ball has come to rest out of bounds, or may be lost, immediately hit a provisional ball so that you won't have to return to the spot to replay the shot. If you are playing a recreational match with a "loose interpretation" of the rules, then simply drop a new ball somewhere around the area where your ball was lost and keep playing.
Never delay making a stroke because you're having a conversation with a playing partner. Put the conversation on hold, make your stroke, then pick up the conversation again.
If using a cart on a cart-path-only day, take more than one club with you when you walk from the cart to your ball. AND, don’t forget the seed mix for your probably divot... Getting to the ball only to find out you don't have the right club or that you made a huge divot with no sand to repair it is a huge time-waster on the golf course.
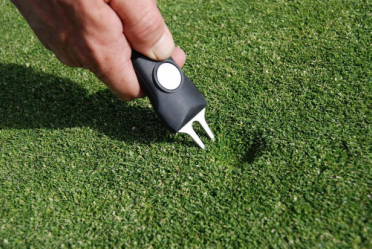
How to properly repair a ball mark on the green
Ball Marks - also called pitch marks - are the bane of smooth-putting and healthy greens on golf courses all over the world. They're the little depressions, or craters, sometimes made when a golf ball descends from the sky and impacts the putting surface. Repairing those little depressions is very important. Equally important is doing it the right way. While many golfers fail to repair ball marks - and shame on you if you are one of them - there are also many well-meaning golfers who do "repair" the pitch marks, only to do so incorrectly.
A ball mark can cause the grass in the depression to die, leaving not just a scar but also a pit in the putting surface that can knock well-struck putts offline. Repairing a ball mark restores a smooth surface and helps keep the grass healthy. But "repairing" a ball mark incorrectly can actually cause more damage than not attempting to repair it at all, as they take up to twice as long to heal as those that are properly repaired.
So golfers, lets all start fixing our ball marks, and doing it the right way. And if you have a moment - if there isn't another group of golfers behind you waiting for you to clear the green - fix one or two other ball marks, too, if you find more of them on the green.
Repairing ball marks isn't just important for the health of the greens, and for smooth-rolling putts. It isn't just a matter of golf etiquette. It is our obligation to help take care of the golf courses we play. And repairing ball marks is a big part of that obligation to the game.
The ball mark repair tool is an essential piece of equipment that every golfer should have in his or her golf bag, and certainly in their pocket while playing.
The first step in repairing ball marks is to take your ball mark repair tool and insert the prongs into the turf at the edge of the depression. Note: Do NOT insert the prongs into the depression itself, but at the rim of the depression.
The next step is to push the edge of the ball mark toward the center, using your ball mark repair tool in a "gentle twisting motion". This is the step where golfers who incorrectly "repair" ball marks usually mess up. Many golfers believe the way to "fix" a ball mark is to insert the tool at an angle, so the prongs are beneath the center of the crater, and then to use the tool as a lever to push the bottom of the ball mark back up even with the surface. Do not do this! Pushing the bottom of the depression upward only tears the roots, and kills the grass.
So remember:
Wrong: Using the prongs as levers to push up the bottom of the depression.
Right: Using the prongs to push grass at the edge of the depression toward the center.
Just use your ball mark repair tool to work around the rim of the crater, so to speak, pushing the grass at the edge toward the center of the depression. One way to envision this is to picture reaching down with your thumb and forefinger on opposite sides of the ball mark and "pinching" those sides together.
Once you've worked around the rim of the ball mark with your repair tool, pushing the grass toward the center, there's only one thing left to do: Gently tamp down the repaired ball mark with your putter or foot to smooth the putting surface._
The following is a YouTube video By Shawn Clement and it is excellent in showing you how to PROPERLY repair a ball mark on the green, even if you only have a tee... Follow this link: https://www.youtube.com/watch?v=f-ZzT8yMnmg
